|
Follow me on Social Media
Shop My Treasures Here
This is my "reason for the season" re-purposed advent calendar project. Fun for the whole family. Each ornament points to the reason for the season. It's a fun Christmas activity.
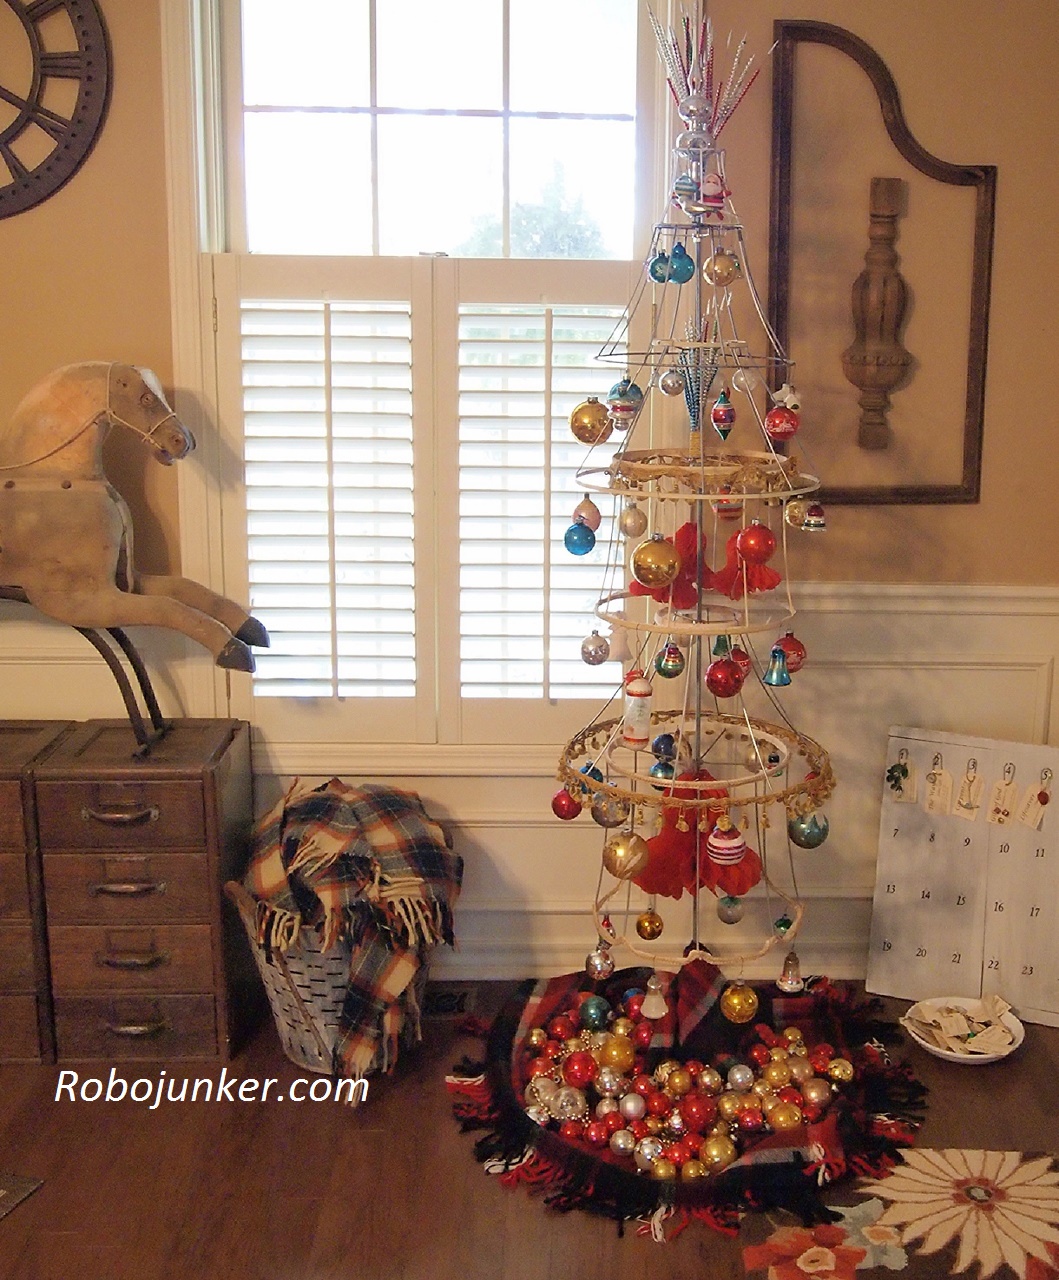
For more photo's and project ideas see my Advent Project pinboard on Pinterest here . Lamp Shade Christmas Tree
For instructions on making this tree go here Inspired by several ideas seen on Pinterest
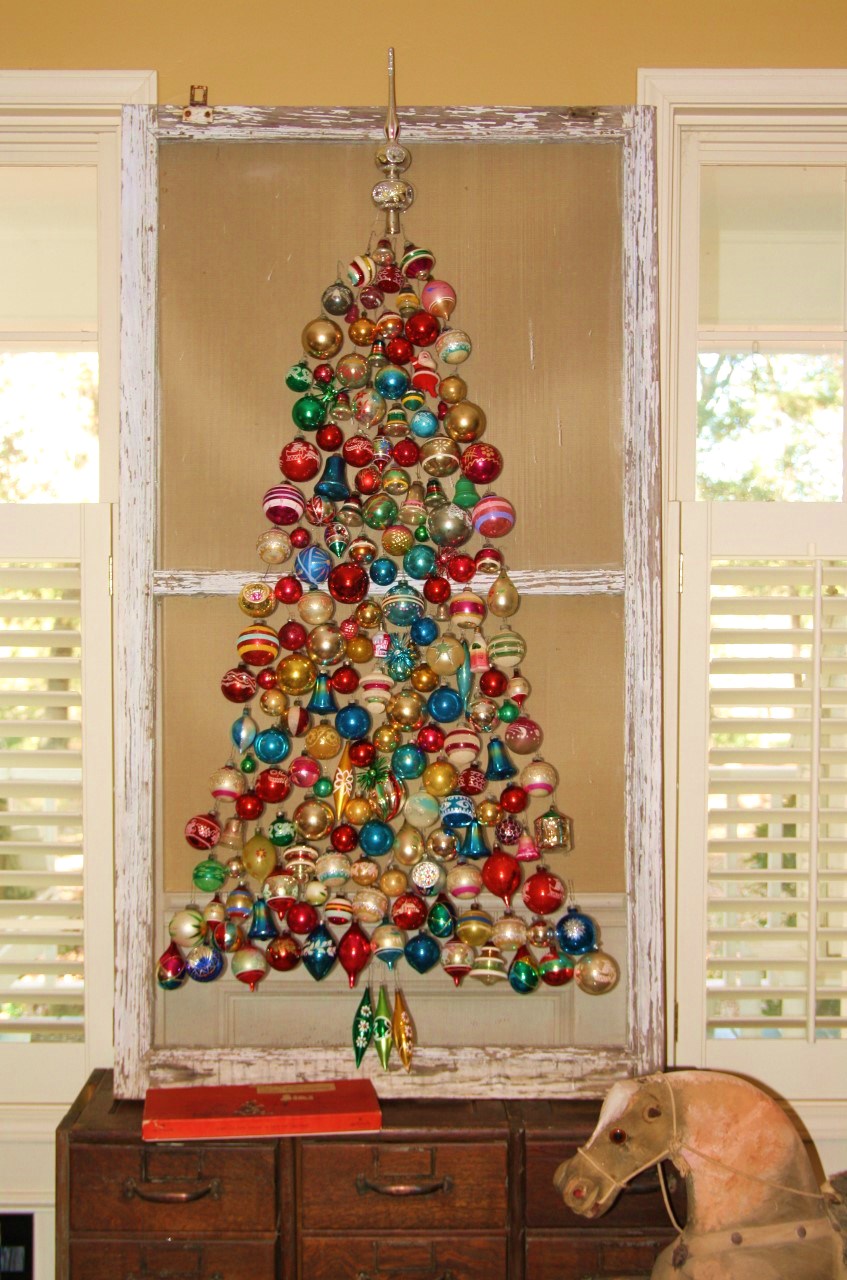
Salvaged Picture Frame Tree
For basic instructions on making this tree, and more inspriational trees go here Lucy Designs
And this one was inspired by a frame mold that I saw in a magazine. I used cut up smaller frames in graduated sizes, mounted on a piece of salvaged wood.
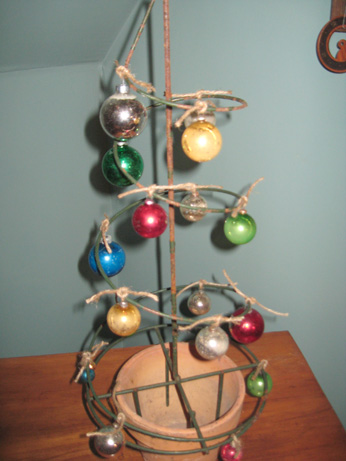
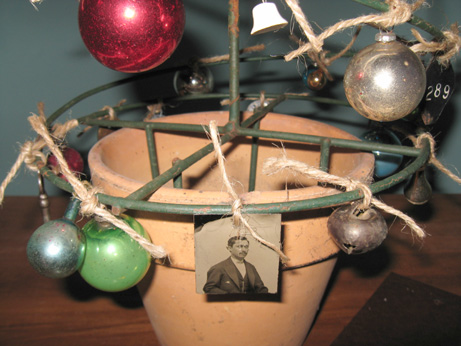
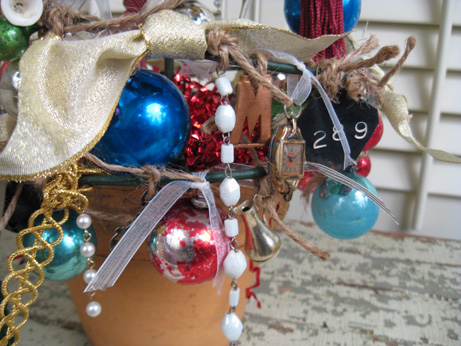
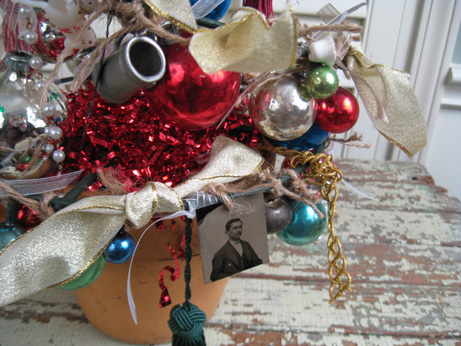
Ornaments on a screen tree These two projects inspired by one seen on So Into Vintage
And a smaller version here
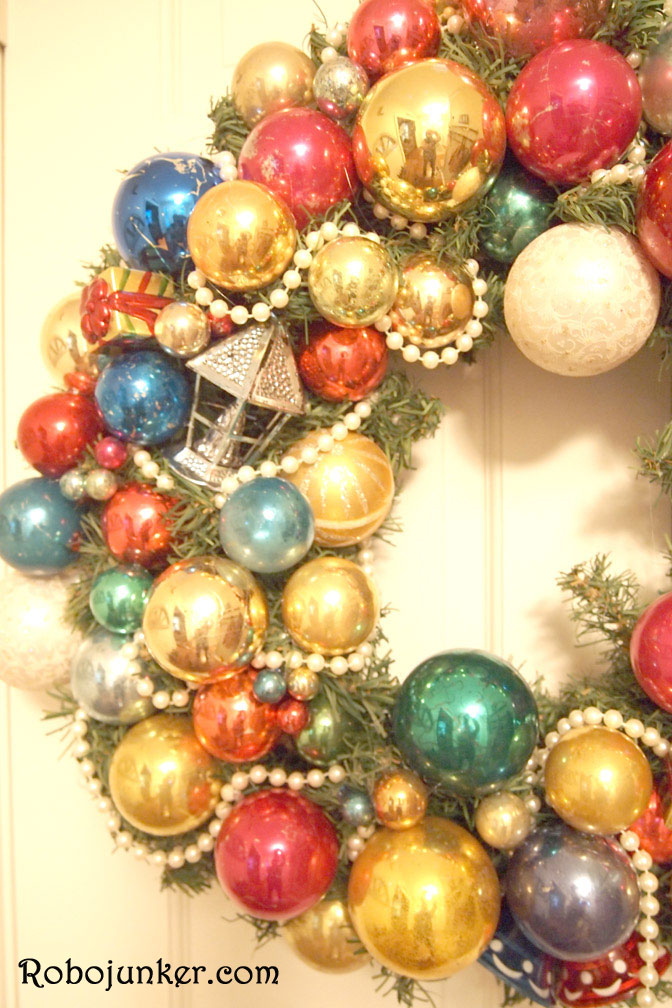
Festive Vintage Ornament Wreath
Take a tired old greenery ornament, and load it up with vintage ornaments for a fabulous new door wreath Spindle Tree
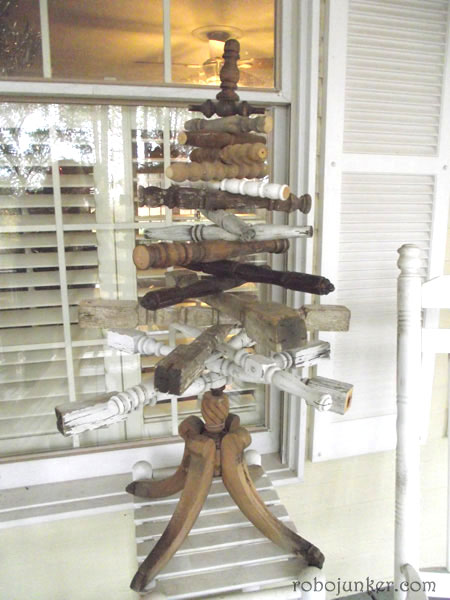
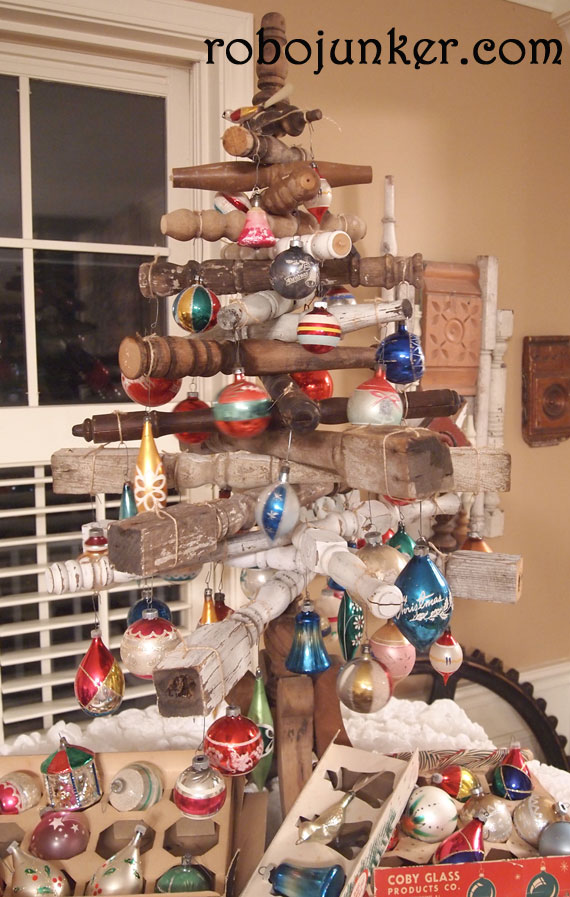
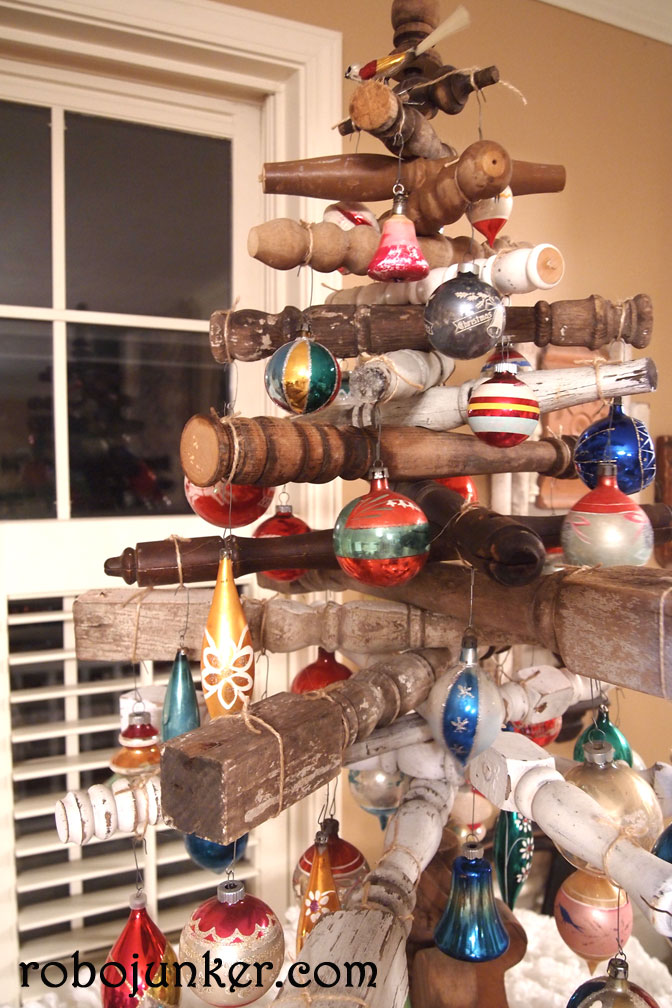
Make a shabby Christmas Tree with vintage spindles, also works with branches. You'll need spindles, Drill and metal rod for this project. An old side table base is also recommended.
Spindle Wire Christmas Tree
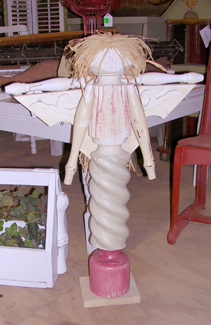
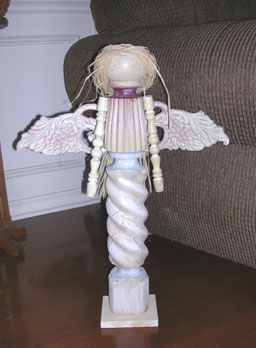
Spindle Angels
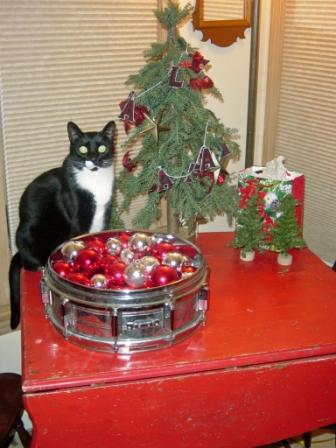
Being in "the business" we actually start this process in the Summer. Seems by the time Christmas actually rolls around I am just about sick of it, but right now is when It really starts to hit me.
Junky topiary form Christmas Tree-by Margo
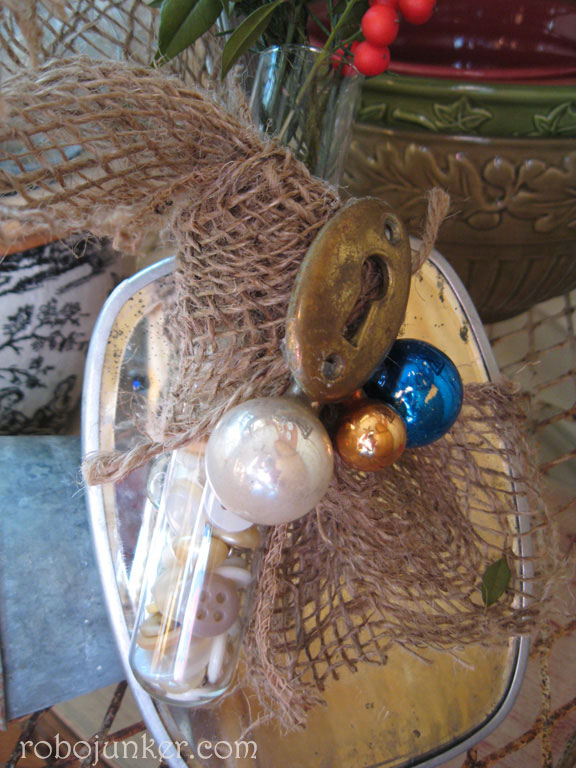
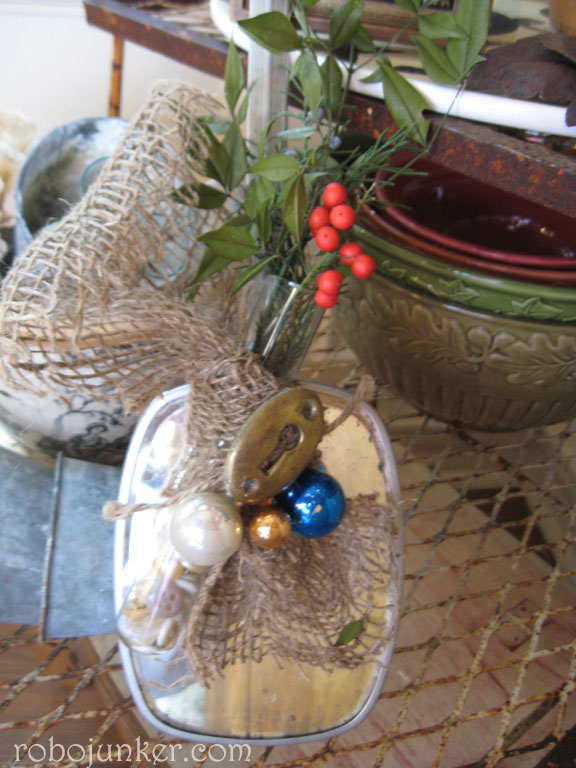
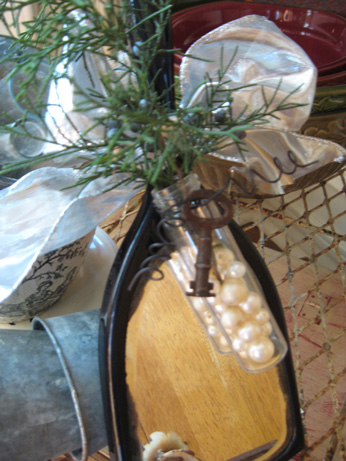
Holiday Hand Mirror-by Margo
Flashy Tree-By Margaret & Lilly of The Veranda
Margaret and Lilly run The Veranda in Canton. Each month they do it up big at their place. I love this idea that I saw when
I was there last weekend. 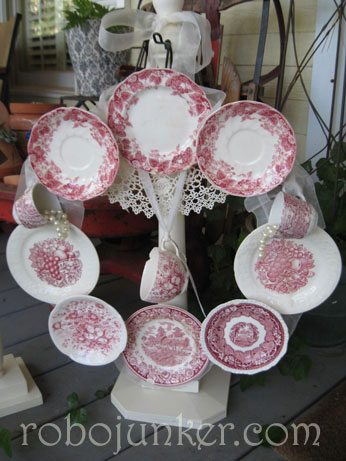
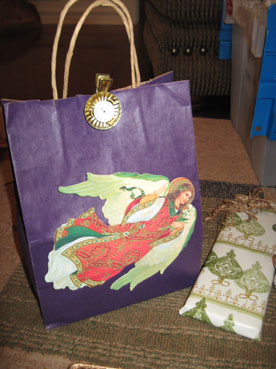
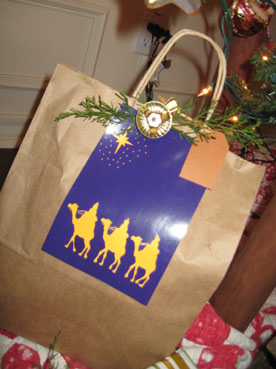
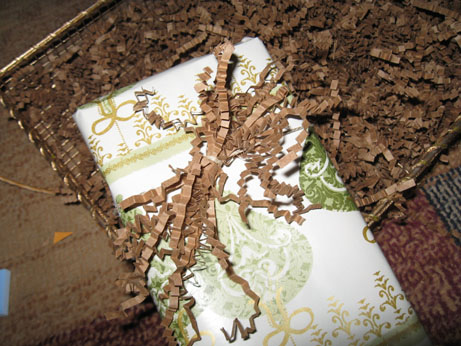
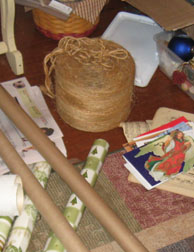
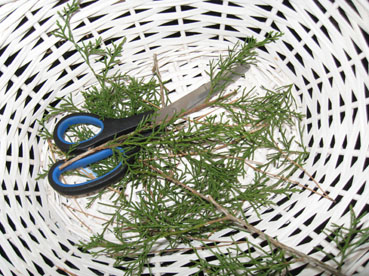
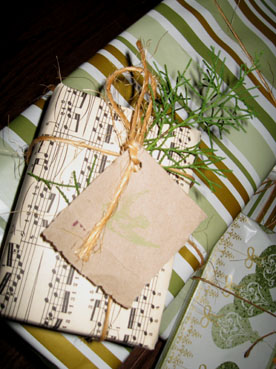
"Green" Christmas Ideas Green means different things to different folks. These ideas are meant to help save "green" and be "green". Many of us have old Christmas decorations that we are "tired" of. They tend to accumulate in boxes, that don't get opened, but also don't get passed on or, dare I say it, thrown out. Before running to the craft store for supplies, take a look through those old boxes of decorations, and see if there is anything in there that you might be able to use for your Christmas crafting and projects. Old Wreaths can be jazzed, up with old Christmas ornaments from the past. One of the neatest projects I've seen this year, were some wreaths that were covered in vintage Christmas balls and other ornaments. How fun would it be to make one of these with special ornaments from your past Christmases. Create a theme like, First Christmas, Child's home made ornaments, toy ornaments, wood ornaments etc. Just load up a wreath, hot glue them down, add some ribbon, and voila', A wonderful new decoration with a story to tell. We all have old ornaments that we don't really care for anymore. What about using these old ornaments instead of bows on your packages. Maybe the recipient will treasure this "new" ornament or even pass it on with their next year's wrappings. Thrifty Christmas Wrappings-by Margo
See this bag
My total wrapping expense this year is ..... $3 for gift wrapping paper. Hope you can use some of these ideas for your wrapping. Have a great Christmas Holiday.
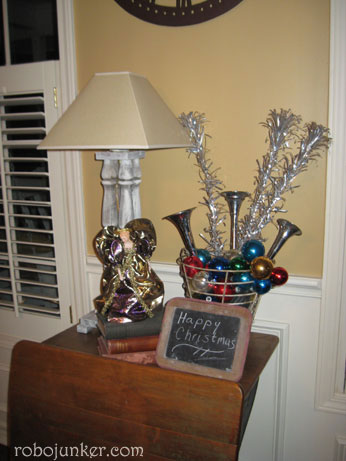
 There are lots of fun uses for old aluminum tree branches
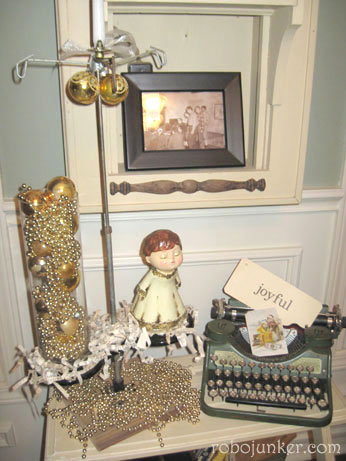 An ordinary old thread stand make a great stage for a holiday display. A simple flash card tucked into an old typewriter says it all.
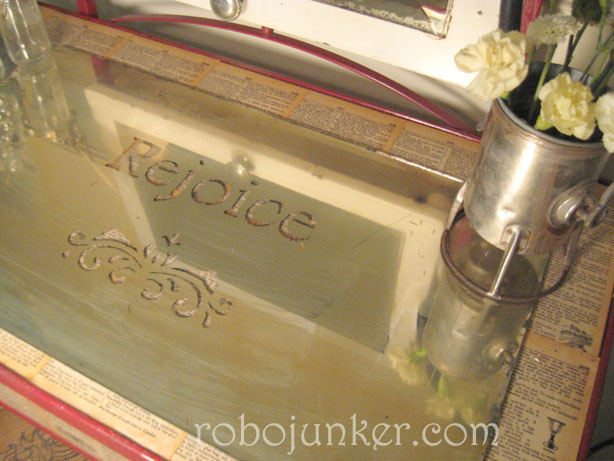
Etched Mirror
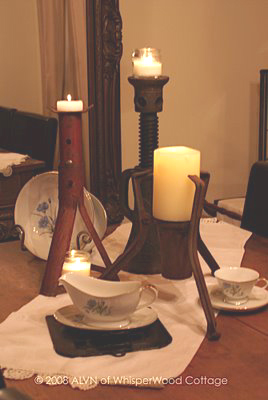
This projects by Alvn of Whisperwood Cottage
For this project, Amy re-purposed some old jacks into candle stands
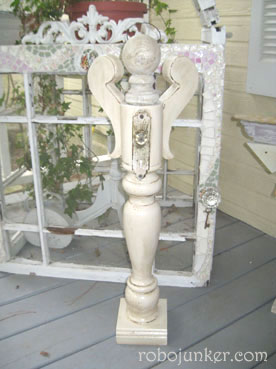
Angel by Margo
But that just seemed too predictable. I picked it up one day, and began turning it every which way, trying to look at it from a different perspective. Suddenly I saw this in my head.
See it's upside-down
I removed one of the tri-pod legs, added a finial and a platform, painted, and added the door plate (which covers the mark left by the removed leg) and glass knob and halo. This was a very very easy project and don't you just love how those legs make wings. So if you've got something you just can't figure out what to do with, Turn it upside-down, side-ways and every which way, and see if it speaks to you. 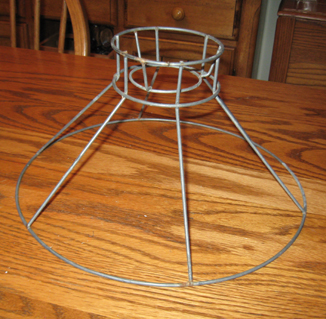
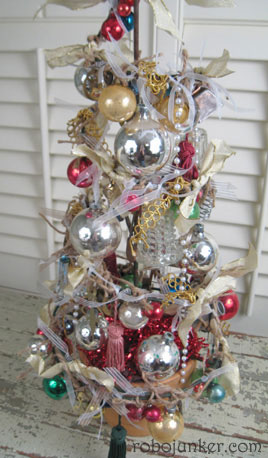
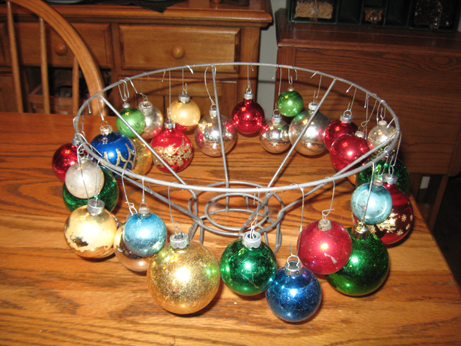 For this project, I took an old lamp shade frame, turned it upsidedown and added lots of Christmas balls. Then I added a bowl, just the right size in the center and made a great centerpiece. Imagine how pretty this would look with Christmas treets inside. 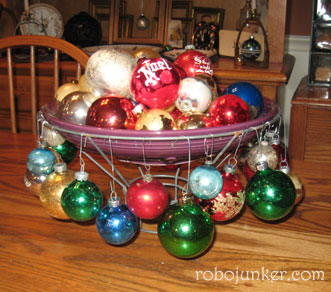 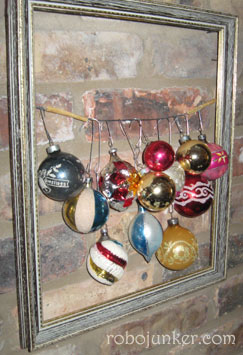 For this project, I took a frame with the hanging wire still attached, and hung various sizes of balls from different length hooks. Couldn't be any easier.  Turn an old Lantern into a Holiday vignette 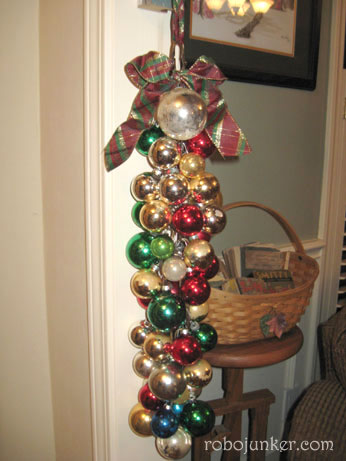 For this project, all I did was take a chain, and start hanging balls from it. I used 2 sizes of hooks, and just loaded it up. When I was done, I tied a ribbon at the top. Rusty Wreath by Linda
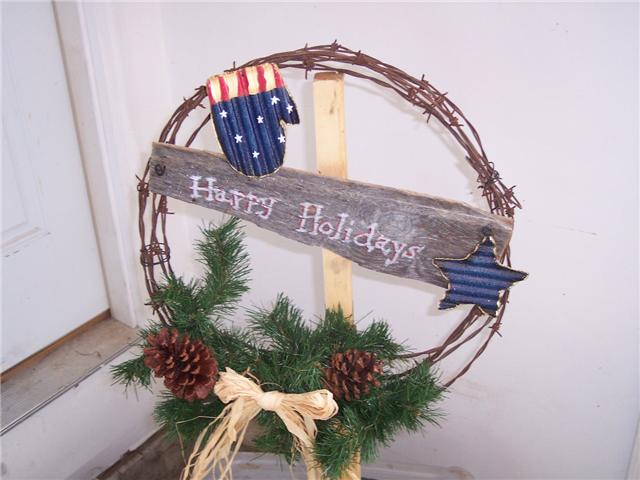
Linda Writes "I made this wreath from some old rusty barb wire and old barn board I found on the farm. The "ornmaments" are recycled from an old garland that I found on a garage sale, the greenery and raffia is a left over from another craft project and the pine cones were free. I sprayed the whole thing with glitter spray for a little sparkle. Everything is wired on and can withstand the weather. The whole thing cost me less than $3." This Week's quick project and project photo by Joy
Thanks Joy for letting me share this one.
This quick project by Alvn of Whisperwood Cottage
How easy is this, Amy turned an old Christmas tree stand into a Champaign holder, Great idea Amy.
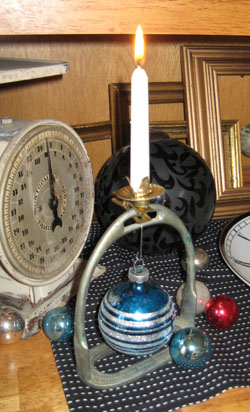
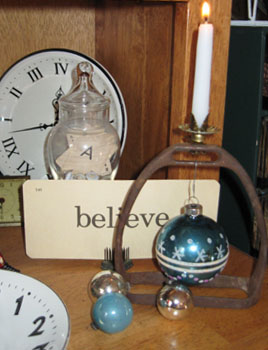
Stirrup some Cheer-By Margo
Talk about simple, I found these stirrups at a recent estate sale. I simiply hung a vintage ornament from them, and cliped on one of those old candle clips, on top. What a great way to highlight a special ornament. You could add some Christmas greenery or ribbon if you want, but I liked them sweet and simple. (always use caution when buring candles)
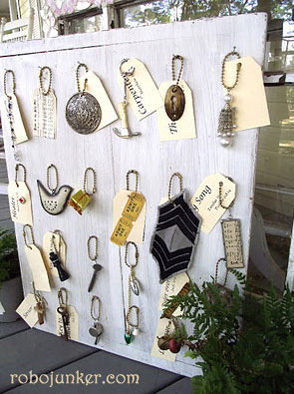
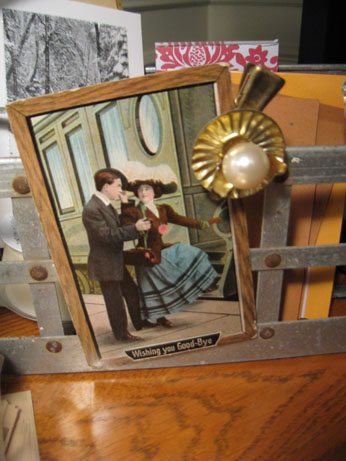
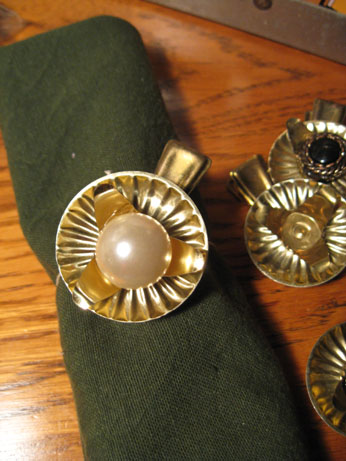
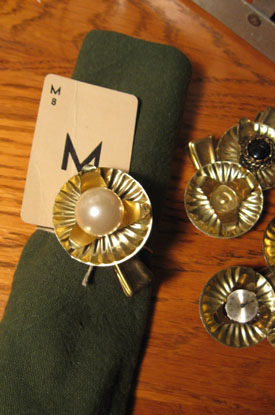
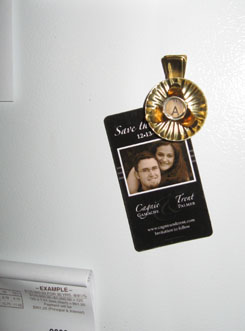
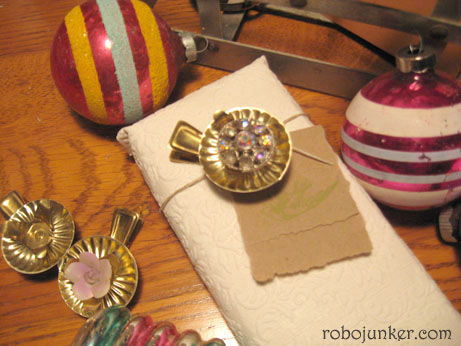
Fun Clips by Margo
I recently picked up a whole bag of these old clips that held candles on a Christmas tree.
Of course I would never use them for that due to the fire hazard, but I had an idea in mind.
First I took the candle holder part, and opened it up
Then I glued various objects in the center. You could use buttons, beads, old jewelry, pearls, I even used watch faces, and typewriter keys.
You can use them as clips for photos, notes, etc
Or clip them to a ribbon and use as napking rings, add a name card for the added use of placecard holders
Add a magnet and they are great for the refrigerator.
Clip them right to gifts instead of bows. The uses are endless, have fun. This is a really easy and fun project. 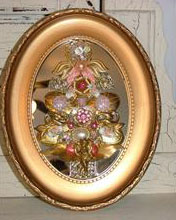
Tina shows her Jewelry Tree, I've been seeing these around a lot. They were popular to make in the 70's, but I really like this one that Tina has in her bedroom. It's very elegant without being over the top.
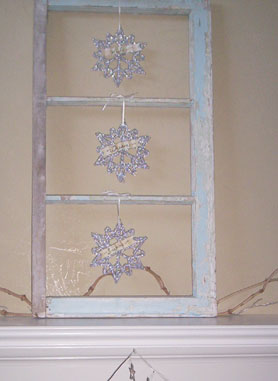
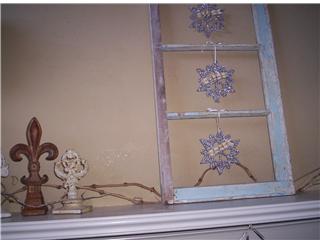 Rosemary shows how she dressed up an old window for the holidays.
 Joyluck from the HGTV board made this great Christmas Window project
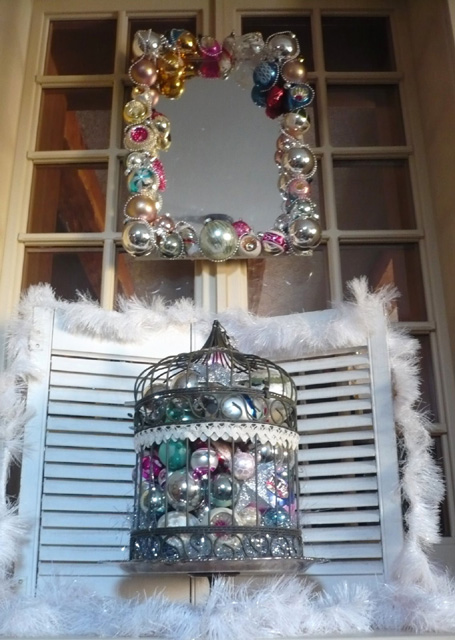
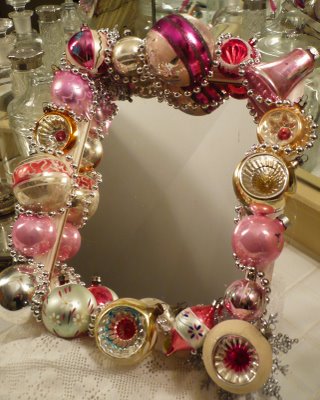
Joy from Joy's house
Joy has at least 3 projects in this display. First is the Stunning Mirror, Joy used hot glue to mount these beautiful Christmas balls to this picture frame. More Christmas balls fill the bird cage below, all in front of 2 beautiful shutters. Thank you Joy for these great ideas.
Here's another mirror she made. 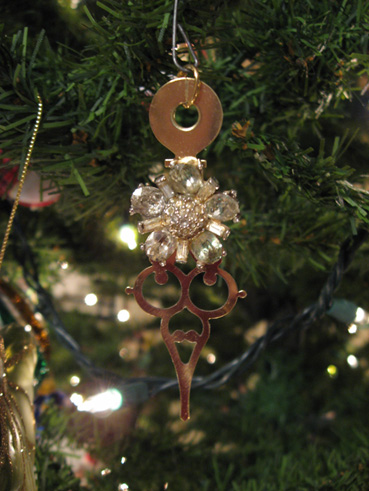 > >
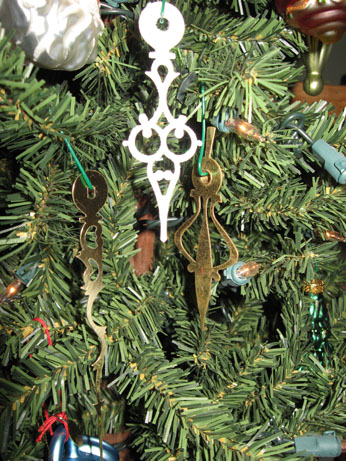 > >These Clock hands make unique and quick ornaments. On one I glued an old piece of rhinestone jewelry. Just picture a whole tree full of these.
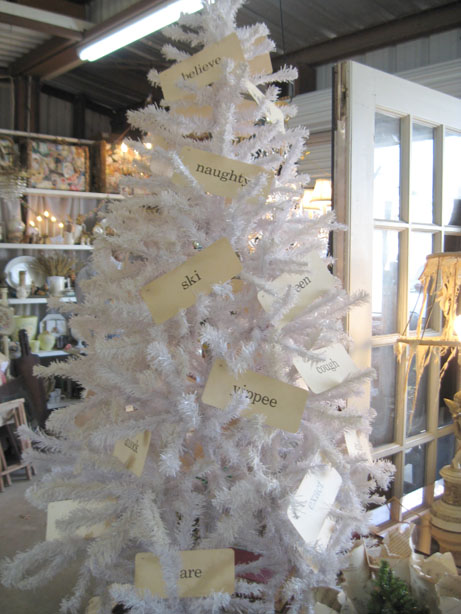
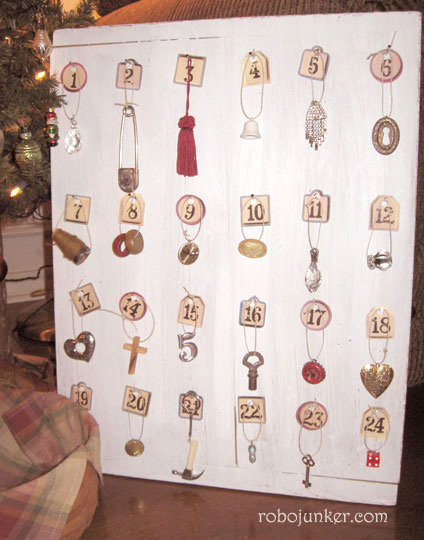
New Twist on an Old Idea Countdown (Advent) Calendar, Make an Advent Calendar from junk bits and redeem the season
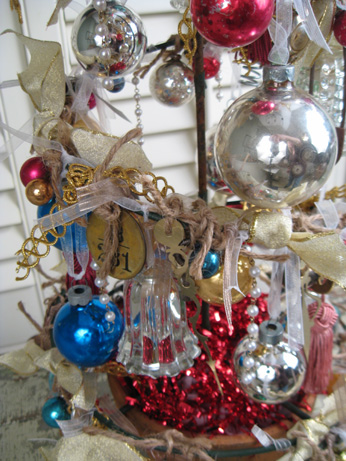
Something to help the kids countdown the days till Christmas. I took a scrap piece of wood, and painted it with one coat of white paint. Then I rubbed it a bit with some sandpaper and marked off a grid of 4 rows of 6 dots, and evenly spaced them, marking the dots with a pencil. Then I hammered in a nail on each dot, leaving enough sticking up to hang things on. I copied some tags that I had in numbers 1-24 and hung them from each nail. Then I gathered up 24 misc items that I had around the house. Everything from buttons, keys, to game pieces, and tied string around each one. The way this works, is you put the trinkets in the basket, and the child pulls one out and hangs it on it's nail, each day. You could even have the trinkets have a significant meaning for you. For instance, a Star of David to mark the beginning of Hanukkah. A Cross, a Hammer (carpenter), Star (star of bethlehem) Even Keys, hearts, and crystals can work their way into your teaching the Christmas story if you wish. Ornaments could also be used on this project. What a great way to get the kids involved in the holiday, and feel that each day they are pulling out a treasure to hang from the Countdown Calendar. Origins of the Advent Calendar: (from Wikipedia) The origins of the Advent calendar come from German Lutherans who, at least as early as the beginning of the 19th century, would count the days of Advent physically. Often this meant simply drawing a chalk line on the door each day, beginning on December 1.
 I love what Rosemary did on this simple project. She used French pots, but you could use regular small clay pots if you'd like. Simply group them on a tray an let a little something shiney drip right out. She also added a bird's nest and used Shiney Balls as the "eggs". What a great display. Thanks Rosemary for this great idea.
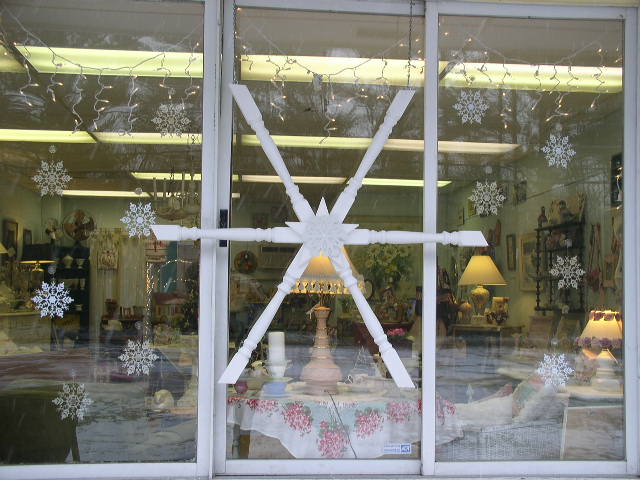
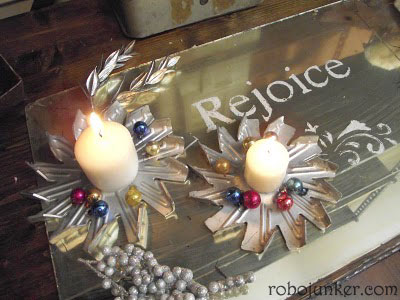
Baluster Snowflake
Her Business Partner Christine sends in this idea from Salvage Chic Antiques
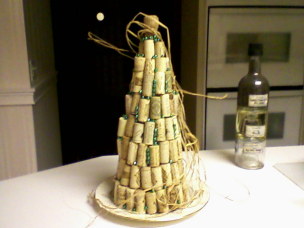
Mim in Ohio shares her wine cork Christmas Tree
Robolady,
I've been following your blog for some time and wanted to share my latest project, just in time for the holidays. The base is a styrofoam cone, the corks were free and the green bling are old Mardi Gras beads hot glued into the spaces. I thew a bit of Raffi on at the last minute. Cost: $1.59.
Rather dresses up Grandma's good china plate don't you think?
Yours in junk,  Look what annielu , from Garden Web made with an old shutter and some skates. Thanks for letting highlight your project. Read more about it here
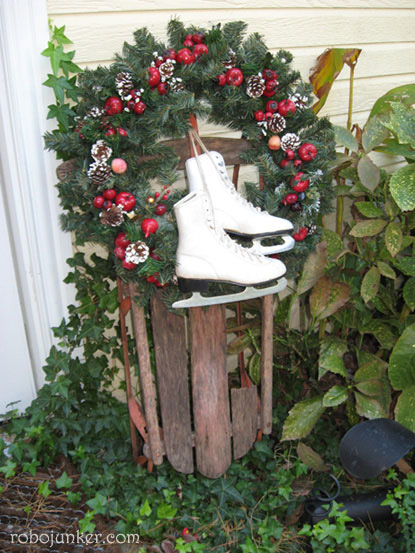 I had purchased an old sled during the summer for $6.00 and it's been sitting in my barn just waiting for Christmas. I almost forgot about it. Also I'd gotten this idea for a wreath last year that was in my idea book, I've had my eye out for old ice skates all year, I found these for $2.00 in the Summer. Then I took an old tired wreath I had in my "worn out christmas stash". Fluffed it up, glued some picks . that I had in a box, added the skates, and then mounted the whole thing on the sled. right now it sits beside my side entrance (the one we all use).
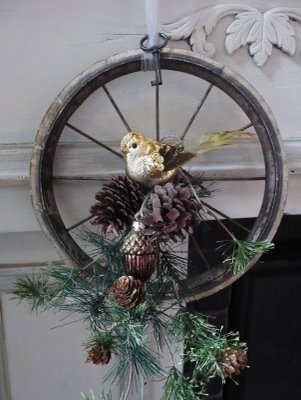
My Blog friend Joy, made this great item out of an old carriage wheel. Isn't it wonderful. What a great item for the Holidays.
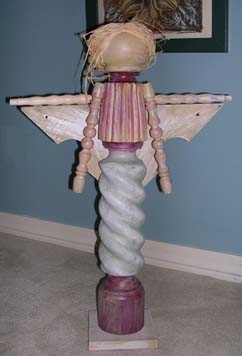
Here's the one I made, it was lots of fun and very easy. I'm thinking of ways to adapt this project for various seasons Angels
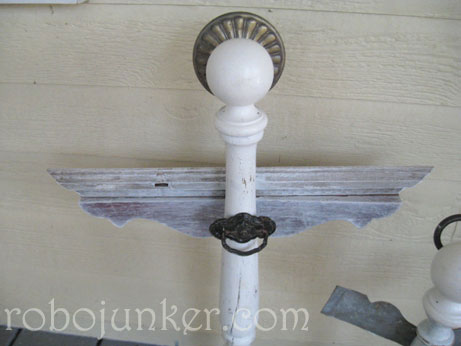
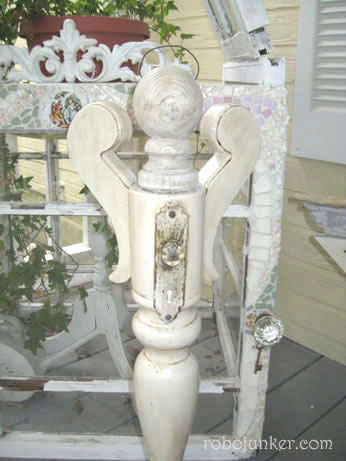
Angels made from old Table Leg and other architectural items. Spindle Angels
|


 .
.